
I always have a lot of projects on the go and my to do list is currently a word doc with tasks laid out for the days of the week. This is pretty effective but it can get messy if I need to break tasks down or if I have too many things on the go.
This weeks cool tool Trello helps you create a detailed to do list and manage it across multiple projects, it also allows you to break those tasks down and assign items to others within your organisation.
It’s a great way to be able to see how tasks are progressing and is possibly the simplest project management tool that I have tried.
Here’s how it works
Visit the Trello website and sign up for an account
Clicking the ‘+’ at the top of the page allows you to create a board or an organisation.
Boards can be set up for either personal projects such as decorating your home, planning a wedding or even starting a blog.
Adding an organisation and creating boards for that allows you to collaborate with others within that organisation. You can also set tasks for individuals and manage progress.
I’m going to concentrate on organisations today.
Click the ‘+’ on the top toolbar
Choose ‘New Organisation’ from the pop up menu

Give your organisation a name and a description if one is required and click ‘create’

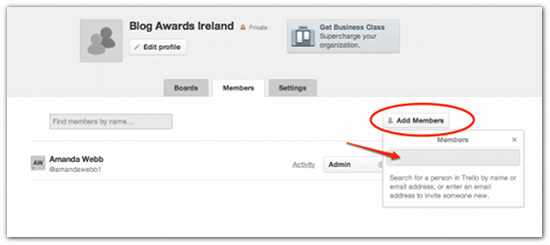
Click on the ‘members’ tab and ‘Add members’ to add other people on your team to the board. If they are already on Trello you can start typing their name or enter their email address. If they are not a current Trello user you will prompted to invite them when you enter their email address.
Now it’s time to create a board.
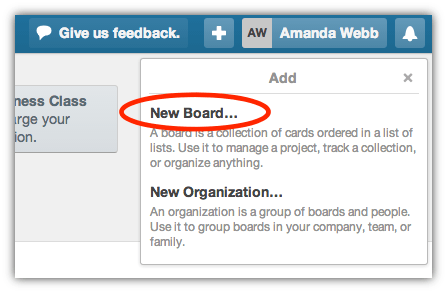
Click the ‘+’ and choose ‘New board’ from the pop up menu.
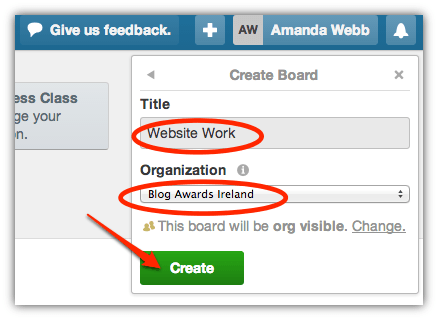
Name your board
Under organisation you can either leave the default setting ‘none’ which will create a personal board or choose the organisation you just set up.
In the example I’m creating a board for developing the 2014 website for the organisation ‘Blog Awards Ireland’.
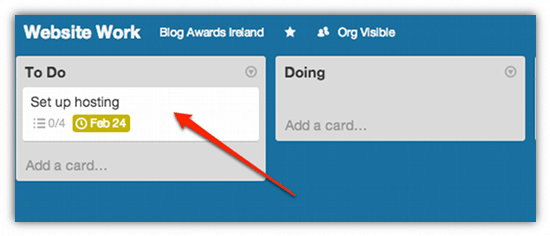
Now you have your board you can start creating cards. You are presented with three sections on your board.
‘To Do’ ‘Doing’ and ‘Done’
I’m going to add some todo items to my board.
To create a card click ‘add a card’

Type your task into the box.
Click on the card you have just created to add more information
This will open up a window that allows you to add some information to your card.

If this is a task for someone else in your organisation you can add them here.
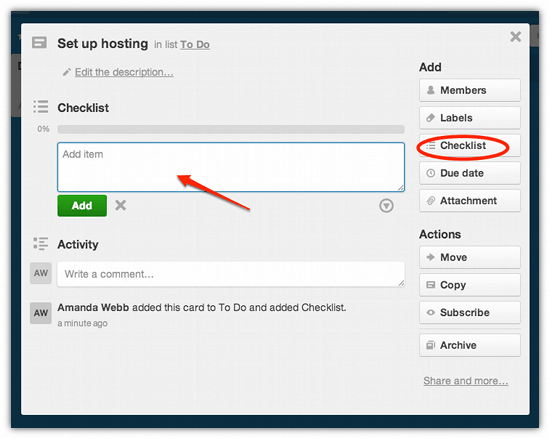
You can add a checklist of the steps that need to be taken to complete the tasks. I particularly like this function. You probably are aware that the best way to complete a task is to break it down into small chunks.
To add a checklist click ‘checklist’ on the right hand side of the window.
Now add your steps one by one. As you complete the steps you can tick them off and each member of your organisation will be able to check your progress.
Click ‘Due date’ on the right hand side. A calendar will appear allowing you to choose the date and time that the task needs to be completed by.

Now your card is set up
Once the task on the todo list is completed you can move it to the ‘Done’ list by simply dragging and dropping it.
I like Trello as a collaborative todo list. It’s a handy way to manage both my own time and the various projects I am involved in. It’s also a great way for me to keep up with the progress of other team members without having to ask.
If you enjoyed this blog post why not subscribe to my newsletter or my blog posts via email. Click here for more info.
